100 Year Old Negatives Found in the Antarctic

The Antarctic Heritage Trust discovered a box of 22 negatives in the corner of a supply hut established by Robert Falcon Scott. They are believed to be from the Ross Sea party of Sir Ernest Shackleton’s Imperial Trans-Antarctic Expedition. History, photography, and antarctic exploration all in one.

Photos can be seen at the Antarctic Heritage Trust and Discovery.com.

New Horizons in Coffee 2 – The Moka

The Moka pot is a steam driven coffee maker, that brews coffee just short of true espresso. The Moka pot does not generate the pressure needed for “true” espresso, and does not always create the crema characteristic of espresso, but the coffee it creates works quite well for lattes and similar espresso drinks.

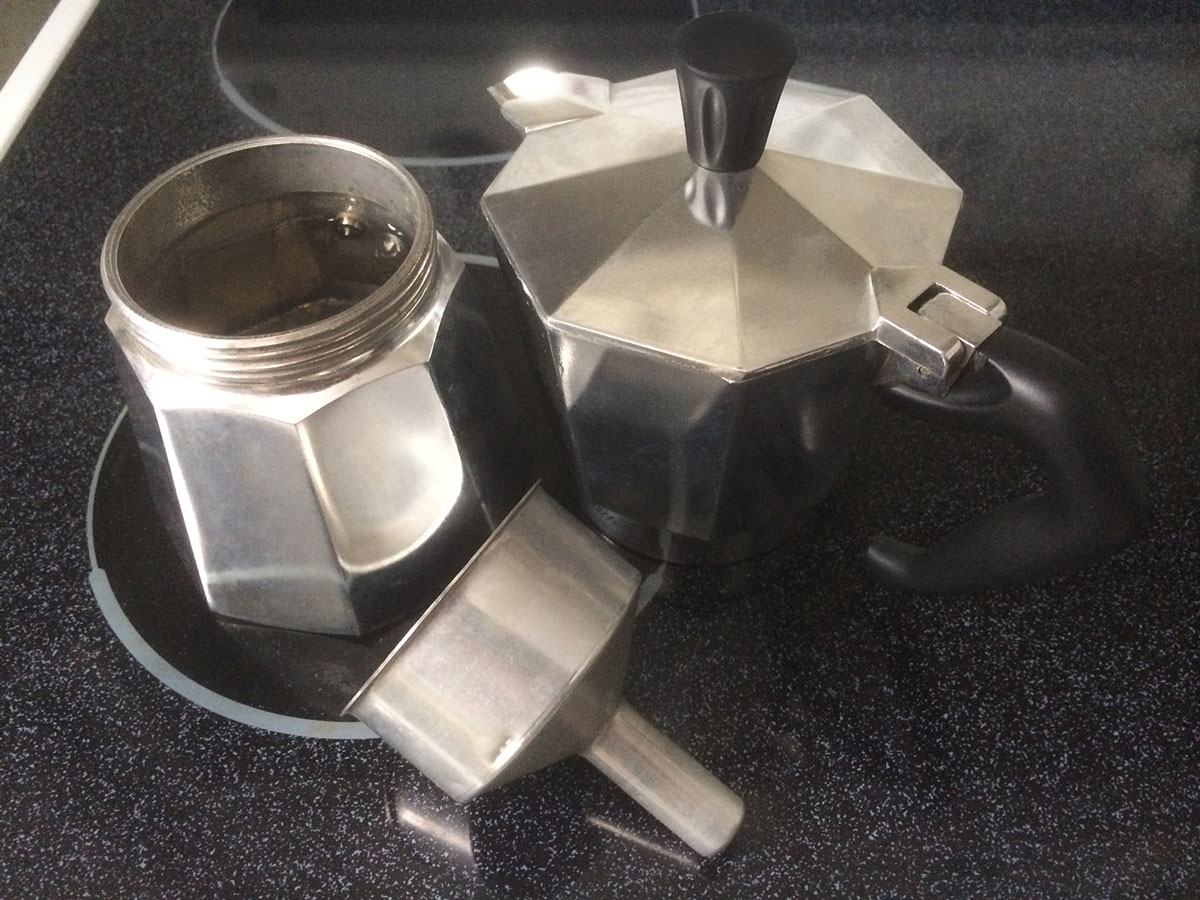
The Moka pot is a stove top coffee maker, although there are also electric models. The coffee maker is in 3 major parts; a bottom with a pressure relief valve, a funnel with a filter basket to hold the grounds, and a top, which includes a perforated disk that acts as the filter, and a gasket that that seals the top and bottom together, and holds the filter disk in place. Replacements parts are available for the Bialetti models, making them easy to fix.

moka_pot_parts

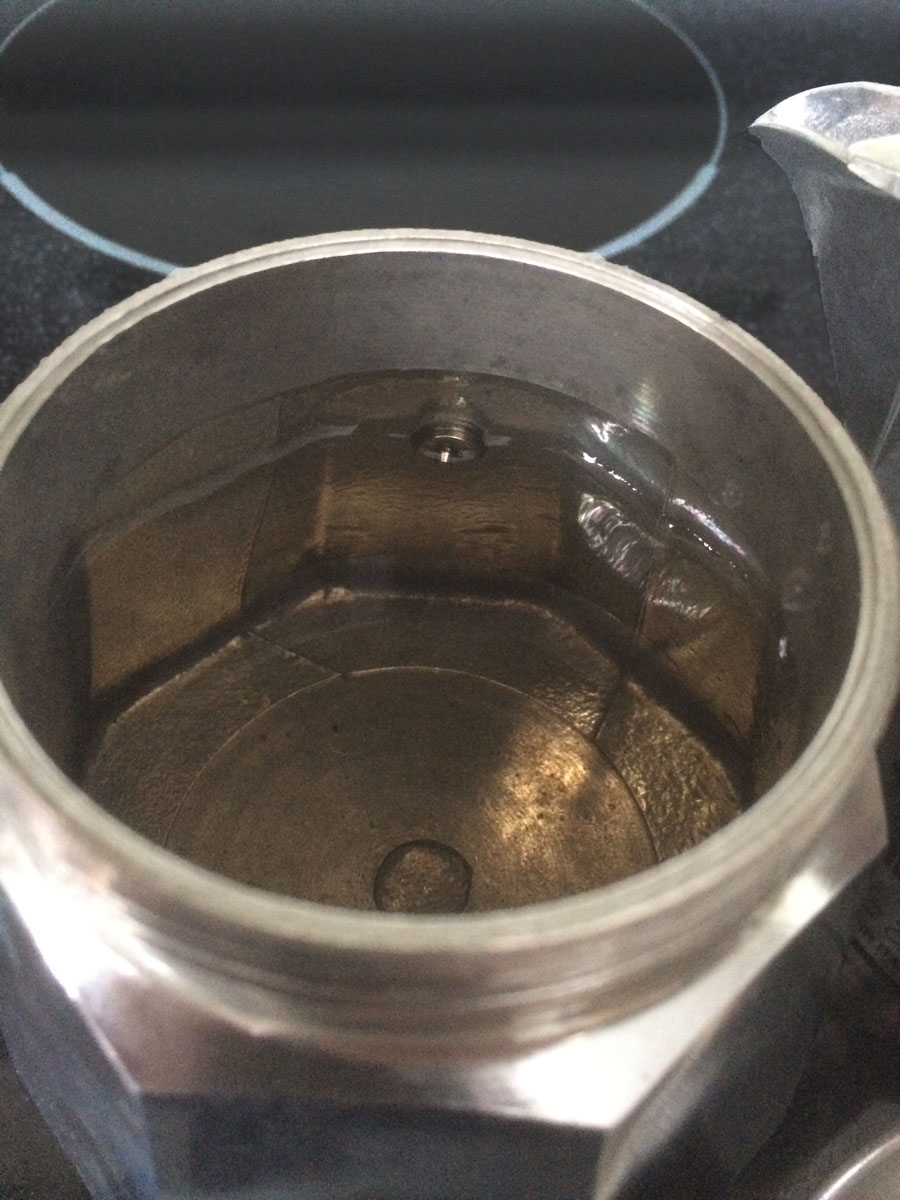
To make coffee with the Moka pot, fill the bottom with water about to the bottom of the pressure relief valve.

moka-with-water

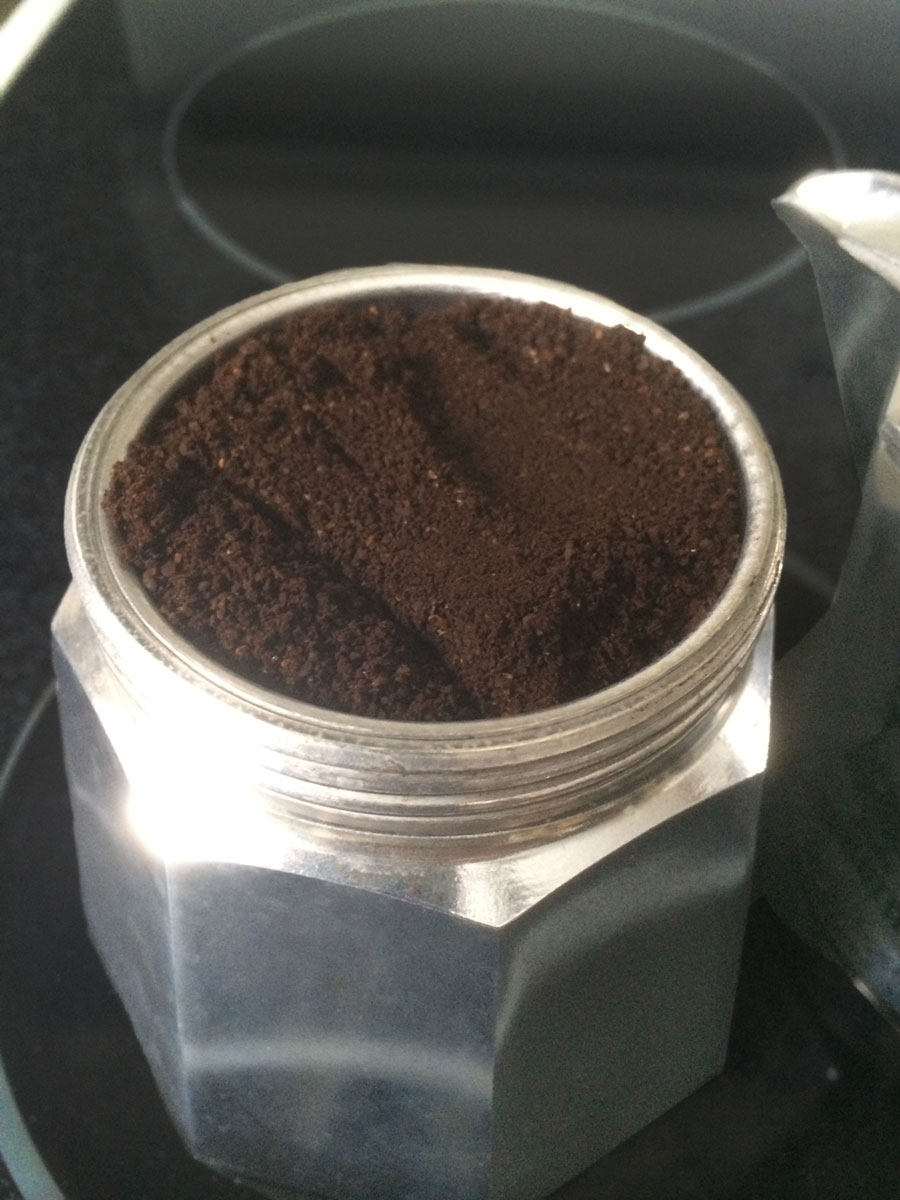
Place the funnel with the filter in it into the bottom. The water should not enter the filter basket. Fill the basket loosely with normal coffee grounds, do not tamp the coffee. Too fine a grind can clog the filter, and tamping can create too high a pressure to build up in the bottom. Remove any grounds around the top of the funnel/lower portion of the Moka. Coffee grounds trapped between the lower portion and the gasket can cause leaks.

moka-with-grounds

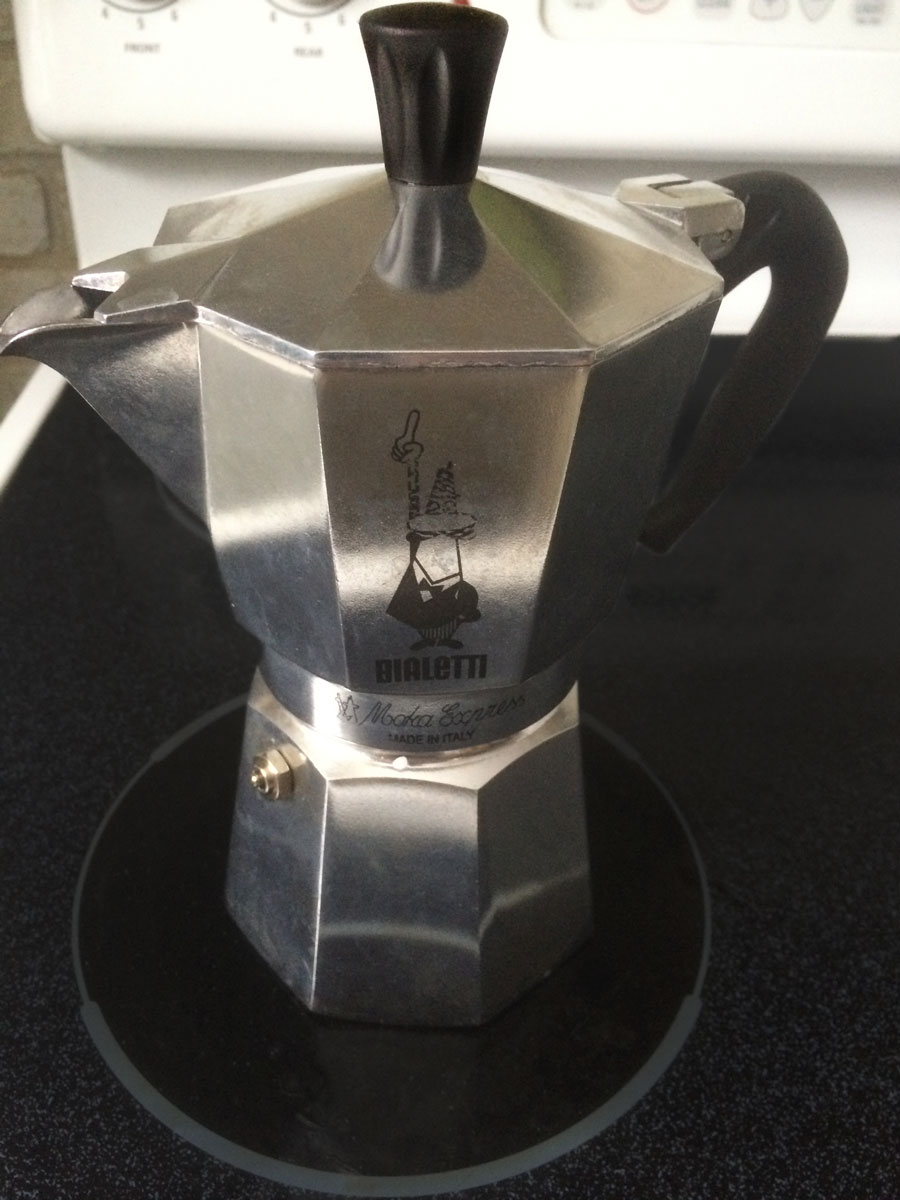
Screw the top onto the bottom, and tighten it fairly snug. Place the coffee maker on a medium heat, until the water starts to boil. I have an electric stove, but gas would probably be better, providing a more consistent heat.

moka-assembled

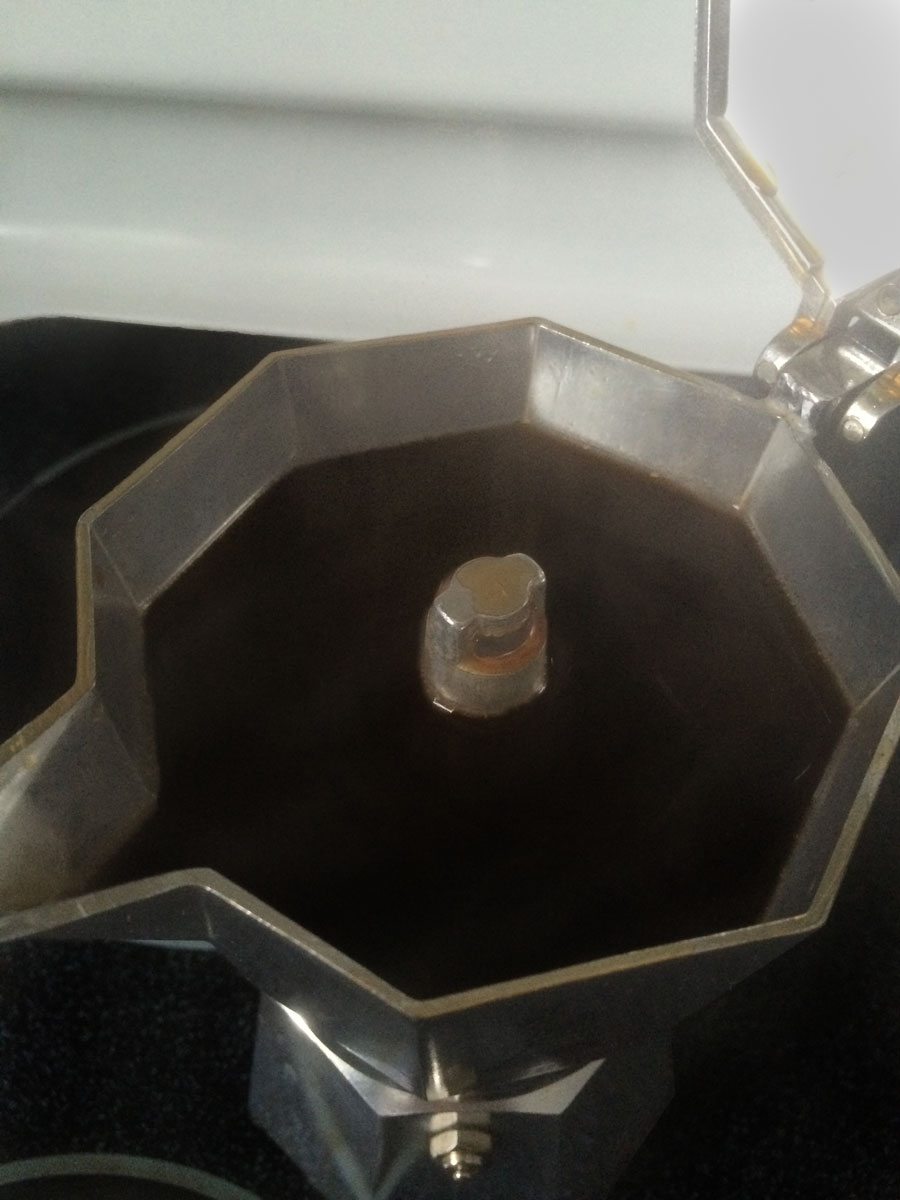
Once the water starts to boil, the pressure of the steam forces the water up through the coffee in the filter basket, and into the upper chamber of the pot.

moka-full

You can drink the coffee as is, if you like espresso strength coffee, or mix it for espresso drinks. I like to use it in milk over ice for an iced latte.

Be careful with the coffee maker, as it will be quite hot after taking it off the stove. Once it is cooled down, remove the upper half, and discard the grounds. Rinse and wipe all of the parts, and allow them to dry well before storing the coffee pot. You should remove the gasket and filter disk from the top occasionally to clean the interior of the upper half. Like any coffee making equipment, you should avoid using soap, since it can leave residue that will affect the flavor of the coffee. Rinsing and wiping with a paper towel should clean the Moka properly.

The Well Rounded Challenge – January 2014

The idea behind the Well Rounded Challenge is to broaden your horizons by challenging readers to try something new.

For the first Well Rounded Challenge, I am taking something I did last month:

Fix something you have been putting off repairing, or would normally replace.

This was one of the first things I thought of for these challenges, because a well rounded person should be able to do repairs, and it is a move away the modern disposable society.

My repair project was an old guitar cable that was not working. The reasons I did this were that I like the cable, it’s a Fender that I bought many years ago with a tweed cover, and also because I do sound at my church, and have a bunch of other cables I need to repair.

I bought an isobutane torch/soldering iron kit and repaired the cable, and have been able to repair other cables since then. An electric soldering iron might be a better choice, but I had some other uses for the torch.

Take some time this month to make a repair something instead of throwing it out. It is very satisfying, usually more cost effective, and less wasteful than replacing the item.

What did you repair? Leave a description, as well as any ideas for future challenges, in the comments.

Finding Wet Shaving Supplies

Traditional wet shaving has experienced a renascence in recent years, more than a little inspired by “How to Shave Like Your Grandpa” at Art of Manliness, one of the things that got me started. One of the major challenges is finding supplies. It’s not like you can just find this stuff at Wal-Mart, right? Actually, Wal-Mart pretty reliably stocks Wilkinson Sword blades, and a decent variety of aftershaves and fragrances.

In my experience, the hardest things to find have been the razors and brushes.

Here are some of the sources I have used, or have found through research. If you know of others, please leave them in the comments.

Online:

eBay is an excellent source for vintage razors and other equipment. Take the standard precautions buying on eBay, read the descriptions carefully, review the seller’s rating, and ask any questions. Additionally, any used shaving equipment should be disinfected before use.

Amazon.com is one of the best sources, stocking everything including safety razors, straight razors, blades, blade variety packs, brushes, shaving creams, soaps, aftershaves, etc. The blade variety packs are a great resource to start out with. I bought one when I started, and am very glad I did.

For those interested in straight razor shaving, I have heard excellent recommendations for whippeddog.com, who specializes in used straight razors. I have not purchased from them, but they have a good reputation, and I intend to unless I find a good straight razor locally.

Local:

Local resources can be a bit harder to find, but are out there.

Antique stores can be a great source of vintage shaving equipment. It is nice to be able to look at a razor before you drop the money on it, although you are probably going to have to spend more time than you would on eBay.

The Art of Shaving has about 110 stores in 35 states. They sell higher end stuff, and the price reflects it. They sell their own branded products, and a variety of blades, straight razors, etc. I was kind of disappointed in the selection of blades they had, since the same blades don’t work for everyone.

Most of the big box stores carry some supplies, as mentioned, Wal-mart usually stocks Wilkinson Sword blades, and most of the others carry some aftershaves, blades, or soaps/creams.

Pharmacies, both the nationals like Walgreen’s, and the local ones, usually have a variety of supplies. Walgreen’s usually keeps a good supply of aftershaves, and usually has some blades.

Sally Beauty carries some shaving supplies in their stores, and a broader selection online.

Bath & Body Works carries C.O. Bigelow shaving cream, which is re-branded Proraso. This is in my regular rotation, especially since they do a carry-on friendly travel size. Keep an eye out for sales, since it’s pretty common to see buy two get one free deals.

Things to keep in mind:

  • Disinfect any used shaving equipment
  • Unless stated otherwise, assume straight razors need to be honed before use

My normal gear:

Book Review: Endurance: Shackleton’s Incredible Voyage

For a joint scientific and geographical piece of organization, give me Scott; for a Winter Journey, Wilson; for a dash to the Pole and nothing else, Amundsen: and if I am in the devil of a hole and want to get out of it, give me Shackleton every time. – Apsley Cherry-Garrard

Sir Ernest Shackleton was, like most great men, also a very deeply flawed individual. After numerous “get rich quick” schemes, he died at age 47, the equivalent of over $1.5 million in debt. But as this story illustrates, he was one of the best leaders in difficult conditions ever.

In 1915, the ship Endurance, with Shackleton and 27 other men on board, became trapped in the Weddell Sea pack ice while trying to make the first crossing of the Antarctic continent. The crew stayed on the ship for about 9 months, until crushing force of the ice broke it up. The crew then set out across the pack ice, large pieces of floating ice. With no way to communicate to the outside world, and really, no way for anyone outside to stage a rescue if they knew of their plight, Shackleton and his crew knew if they were going to live, it was up to them. Traveling first across the ice, then in boats in no way suitable for the sea conditions, they worked their way toward safety.

Conditions change constantly, and nothing is ever quite what someone unacquainted with the conditions would think. Warmer weather might seem welcome, until the surface of the ice is mush, filled with sink holes. Storms can be terrifying, and damage tents and equipment, but were always welcome, so long as they blew in the right direction. Several times and ice floe breaks up right under a boat, or between the party and important supplies.

Alfred Lansing puts together information from crew diaries, personal accounts, ships logs, and interviews into a very compelling story. A story of heroism and leadership in some of the most adverse conditions available. This is not a story for the faint of heart: it is a survival story, and it’s often not pretty, but it is always inspiring, and one of the most inspiring survival stories you are likely to find.

Available from Amazon, iTunes Audiobook or E-book, or your favorite bookseller.

New Horizons in Coffee 1 – The French Press

Coffee is good. Can it be better? That depends on your taste, but I would recommend trying a few different ways of making it.

The most common way to make coffee (at least around here) is drip brewing, where hot water is dripped over grounds, filtered through a paper or mesh (usually brass) filter. This is a very convenient and consistent way to make coffee, but it tends to not be as strong as other brewing methods, and you lose some of the oils and other compounds that contribute to the flavor, especially with paper filters. I am going to post on several different brewing methods that I use, and maybe try a few new ones.

Making coffee with the French Press

20130604-073719.jpg

The Tools:

The French Press is a very simple coffee maker, consisting of a container, usually a glass beaker, and a plunger mechanism with a mesh that strains out the grounds when depressed. I usually use a Bodum Chambord Coffee Press, but there are many other options, including travel mugs, and even one built into a backpacking stove.

You can use a pot or kettle on a stovetop, but I prefer an electric kettle, since it boils water quickly, and shuts off automatically once the water boils, so you don’t have to worry about leaving the stove on.

Since the French press needs a fairly coarse grind, a blade grinder will work, but a burr grinder provides a more consistent grind, and allows you to predictably adjust your grind, especially important if you use different types of coffee makers.

The Process:

Boil the water and grind the beans. I usually go right around the 2 tbsp to the 6 oz cup mark, but you can adjust to taste. When grinding for the french press go with one of the coarsest grinds available, as the finer grinds can plug up the filter mechanism, and pass through it into your coffee.

I usually use boiling water, which ends up with a slightly more bitter taste than water a little below boiling. You can boil the water, then add a little bit of cooler water to bring the temperature down to about 200 degrees.

To even better control the temperature, I warm the press up with hot tap water. Fill the press, insert and depress the plunger, and let it sit for a minute or so before making the coffee.

Once you have your water, grounds, and warmed coffee press, place the grounds in the press, then pour the water over it to a little below the top, and stir. The manufacturer instruction say not to use a metal spoon, but it hasn’t killed me yet. Just be careful not to hit the sides, as you may damage the beaker. To maintain a higher temperature, place the top on, but don’t depress the plunger. Allow the coffee to steep for 4 to 5 minutes (adjusting to taste.) When the timer is done, slowly depress the plunger. If the plunger gets clogged, you can pull it up a small amount (1/8 inch or so) do dislodge the grounds. Allow the coffee to sit for a couple minutes for any grounds in the coffee to settle before pouring.

Cleaning the French Press

To clean out the grounds, I use a rubber spatula, then rinse the beaker and plunger. It is recommended to avoid using soap on coffee making equipment because it leaves a residue that can interfere with the flavor. I just use a paper towel to remove the coffee residue, rinse the press, and dry it, or allow it to air dry.

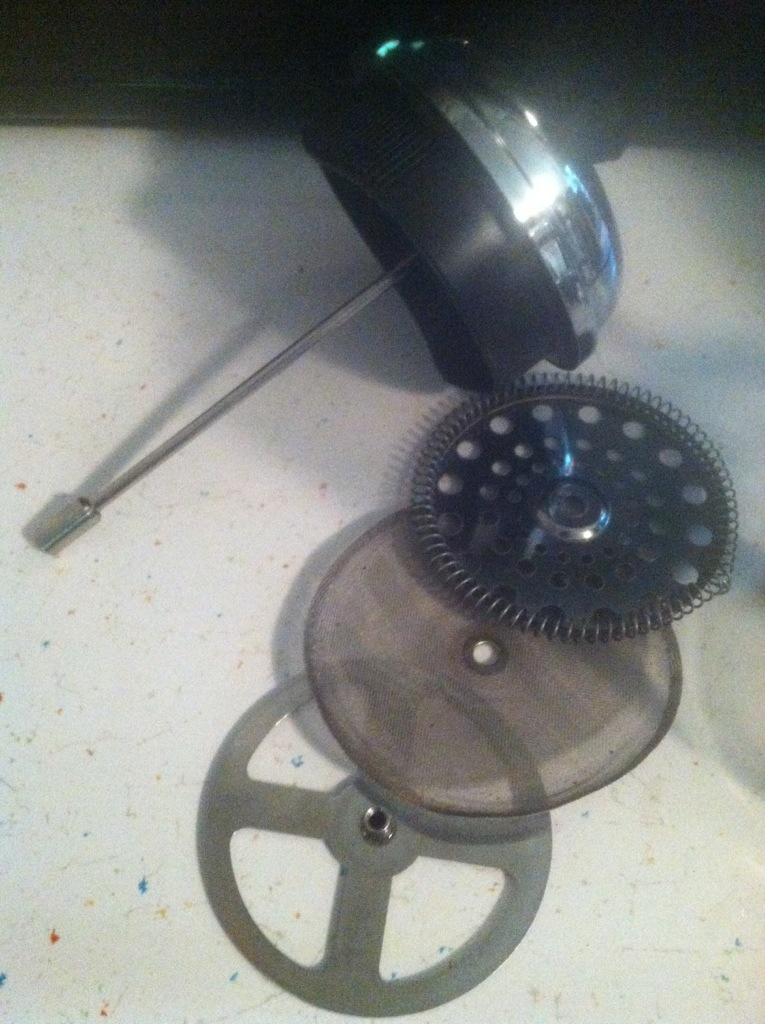
Grounds can get stuck in the plunger, and to clean it, the plunger can be disassembled:

20130604-075650.jpg

The elements on the bottom simply unscrew. Be careful with with the screen, the edges are folded over, but there can be sharp wires. Make sure the screen goes in right side up, so that the folded ends are to the inside. I usually loosen it up and rinse it most times that I clean it, and disassemble it once a week or so for a better cleaning.

How do you like your coffee? What is you favorite coffee maker? Leave a note in the comments.

Getting Started Scuba Diving

Scuba diving is an exciting and, when done properly, safe activity. I am licensed as an open water diver, the most basic certification, and certified as a dry suit diver, since I am in Wisconsin, and any diving I do here is pretty cold.

Before going any farther, this post will talk about how to get started, including how to get the training to get certified. DON’T THINK YOU CAN DIVE because you read this or anything else online. GET CERTIFIED. While diving with the proper training is a reasonably safe activity, diving beyond your capabilities CAN KILL YOU. If anything here conflicts with what your instructor tells you, go with the instructor.

With the nod to the lawyers out of the way, let’s talk about why you might want to dive. I love to see shipwrecks, of which there are a lot in the Great Lakes. I also love the freedom, the feeling almost of flying that you get underwater. You may also want to take your nature viewing to a new level, or be an explorer in one of the last places you can go that people haven’t already seen. The underwater world is one that not many people get to experience firsthand, and there is something special about being one of the few that gets to.

Certifications:

Before most dive shops will sell you life support equipment, or charters will allow you to dive, you need to be certified, at least as an open water diver, and then for any specialties required for the dive, like deep dive, nitrox, or dry suit. There are several organizations offering certifications, the two most common being PADI and SSI. PADI is by far the most common one in the US, SSI seems to be more popular in Europe. My certifications are through SSI, mainly because of a relationship I had with a specific dive shop.

Some resorts have a “resort course” that allows you to dive with one of their guides, but does not carry over to anything else. These can be a good way to try diving, but remember they are only good for that resort, and probably only for that trip. Before you do any training, make sure of what you are getting.

The next level is open water certification. This will be taught through a dive shop, some resorts, or other charter/dive operations. To get the certification, you need to complete certain classroom time, which can also be completed online through SSI or PADI. Then you will go through two days of dives in a pool, and then two days of diving in open water, like a lake or ocean. Both in the pool and open water dives you will be taught skills that include problem resolution like how to clear water from your mask underwater, how to retrieve a regulator if you lose it, or what to do if you run out of air.

What open water certification gets you:

  • The ability to buy life support equipment (regulators, BCs, computers)
  • The ability to do most basic dives with charter boats or other dive operations
  • qualification to perform dives to 60 – 80 ft, with a buddy, on air.

It does not qualify you for:

  • Deep diving
  • Mixed gasses (Nitrox, Trimix)
  • Solo diving
  • Overhead environments, like caves or shipwreck penetration.
  • Decompression diving (Dives that require stops to decompress)

The above lists are guidelines, follow up with your instructor on anything you are not clear on!

Once you have the Open Water certification, you can go for more advanced classes and certifications, like wreck diving (Still non-penetration) Nitrox (an oxygen enriched breathing gas that allows more dive time without needing to decompress) or dry suits.

Preparing for the Open Water Certification:

Visit a few shops if you have the option, talk to the instructors, and get a feel for them. You want to make sure that you are completely comfortable with the operation as a whole, and with the instructors you will be learning from.

Most places include the equipment you need, except for a snorkel, mask, and maybe fins. The exposure suit, life support equipment and tanks will be provided by the school.

Choosing the equipment you need:

Snorkel – pretty basic, make sure you have one with a purge valve at the bottom, and avoid the “dry” snorkels, especially one you are using for diving. Dry snorkels can have benefits when snorkeling, but will have no benefit when diving.

Mask – This you are probably best off going to a local shop and finding the one that fits you best, and that you are comfortable with. The mask should be comfortable, and should have a good seal to your face if you gently inhale through your nose. The silicon skirt around the lens is usually black or clear. The black ones may feel a little constricting, while the clear ones can let in more light around the edges than you may like. Try it out and see. A note on clear skirts, they will yellow a bit with age. Not a big deal, don’t panic.

Fins – NOT FLIPPERS. There are a fairly wide range of options here. They are divided roughly into full foot and adjustable (or open heel,) and split or blade. Full foot fins have a full, shoe-like pocket that fits your foot, adjustable fins have a cup-like pocket, and a strap or spring around your heel. Adjustable fins are made to be worn with neoprene booties. For diving, get adjustable fins. The full foot fins are good for snorkeling in warm water, but not for the heavier loads and colder waters of scuba diving. Split vs. blade fins are the subject of not a few holy wars. I dive split fins, and it probably comes out to this: blade fins may be little more efficient at the upper end of power, and are needed or better for some of the specialty kicks used by technical divers. The split fins are easier for the majority of divers to use. In short, your first pair should probably be adjustable split fins, but as always, talk to your local shop, and, if possible, try some options.

 Other Parts of Your Diving Equipment:

in addition to your snorkel, mask, and fins, there are a number of other pieces of equipment you will be using. This list is just to get you familiarized with the rest of the equipment. You should wait until you are certified to purchase any of the rest of this.

Exposure suit – There are two types you might use, a wetsuit and a drysuit. Wetsuits are made of neoprene, and are made to trap water next to your body. They provide insulation, and provide some protection from rocks, jellyfish, and other underwater hazards. Wetsuits are available in anything from shorties that cover your upper legs and torso, to full body suits with gloves and hoods. Most drysuits are manufactured from either crushed neoprene, or a sandwich of rubber and fabric know as tri-laminate. Drysuits are designed to be worn over a snowmobile suit style undersuit, and they are intended to keep the wearer dry. The drysuit is connected to your first stage regulator, and can have air put in it, which provides buoyancy, loft for the undersuit, and prevents the suit from crushing or pinching down on the wearer. Because of the air in the suit, the diving characteristics of a drysuit are considerably different from wetsuits, and certifying agencies have a separate certification for diving in drysuits. There are some potential risks to diving drysuits if you are not familiar with them, but once you are, they are as safe a wetsuit. Some manufacturers also produce “Semi-drysuits,” which are a better sealed than a normal wetsuit, but the diving characteristics are most similar to a wetsuit, and they do not require extra training.

Regulator – A regulator consists of a first stage and a second stage. The first stage attaches to the tank, and provides a high (tank) pressure port for a pressure gauge so you can tell how much breathing gas you have left, and several low pressure ports that allow for the attachment of the second stage, your buoyancy compensator (BC or BCD), and the inflator for your drysuit, if you are using one. The second stage is the part that you breath from, it’s job is to provide a regulated air flow, at the pressure of the surrounding air or water. You have a primary and secondary (or octopus) second stage. Some BCs also have a built in backup regulator.

Knife – A knife is important for a couple of reasons. You can use it to cut loose if you become entangled in something like a rope or fishing line. It can also be used to bang on your tank as an underwater signaling mechanism.

Dive Computer – A dive computer is a combination of, at minimum, a depth gauge and a timer that calculates how long you have been underwater, and an algorithm that calculates how much longer you can stay underwater without going into decompression requirements. Most basic computers include this, as well as temperature, and maybe variable oxygen percentage for nitrox diving. More advanced models also integrate with your regulator and provide tank pressure data, and even features like a compass.

There are plenty of other things to spend your money on, but those are beyond the scope of this article.

How to not die:

Diving is safe if done correctly, but things can go very wrong. If you follow these, you should be fine.

  1. Know your limits, and abide by them. This includes training, but also knowing when you are not comfortable with a dive you normally would be.
  2. Remember the basics. No matter how advanced you are, doing something like holding your breath while ascending is going to do bad things to you.
  3. Plan your dive, and dive your plan. Getting outside your plan is a pretty quick path to getting outside your limits.
  4. Have the right equipment, and make sure it is maintained.

In short, don’t be stupid.

In conclusion:

Diving is great fun, and can be quite safe if you go about it responsibly. If it is something that interests you, find a dive shop in the area (SSI, PADI) and talk to the people there. Most of them are very happy to introduce diving to new people, and help you progress as a diver. Be safe, and have fun!